Showing posts with label arduino. Show all posts

Sunday, January 25, 2015

Rocket man and the Near Space Circus

Space = rockets


That's what we tend to equate, cause we love them rockets... And, to reach space, it does require a rocket of some sort, at this point. To "explore" space however, at a minimum, only requires a cloudless night, away from the city, and there, with the naked eyes, you can watch the stars, not just a few, but hundreds (some apparently can see upwards of 3000!). Or perhaps you choose a full moon. One can get pretty close even with a 35mm or digital camera with a modest zoom and a tripod.

The Moon, Sept. 9th 2014, DSLR at 270MM

Albedo 0.39


The Moon is nice and all, and is great for black and white photography. And there is nothing wrong with that. In fact, there was an interesting talk back in 2012 by Fred Alger, at PyCarolinas: "Sysadmining Python to the Moon". But the blue planet, the earth is a lot more impressive (picture from that talk):

curvature.jpg

Except that we are back to rockets again? Or are we? Both Fred's talk and mine that year talked about a near space option.

Near Space


Weather balloons will get you into near space. Space officially starts at 100KM, but one can reach 35-40KM with a latex balloon filled with Helium. Add a parachute, a radar reflector and a payload, and you have your own little private launch and recovery system.

And nowadays, the payload options are numerous. The main thing is that we are no longer limited to sending microcontrollers, but can send actual computers running an operating system, and executing Python code.

An obvious candidate is the Raspberry Pi. Dave Akerman (whom I had mentionned in my talk) has been sending them into space for well over two years now. So when he sent a tweet earlier this month about the Global Space Balloon Challenge, I knew this would be the perfect project for our local Python user group, using a payload with Raspbian Linux and Python on a Raspberry Pi model A+. So many projects are possible within this project.

Hence, Team Near Space (Flying) Circus was born. Let's hope the snake and the penguin will play nice up there...

François
@f_dion

Friday, January 2, 2015

Innovation is not a hotdog

Once upon a time


You would walk in a supermarket, buy hot dogs and hot dog buns. It was a pretty straightforward process. Sausage pack, check. Buns, check.

Then, someone had the idea of making a bun length sausage. Hmm, ok, except that different brand of "bun length" sausages and buns all have different metrics. But hey, that's ok, it was a valiant effort.

More is more


Some time passed, and somebody thought, "hey, let's make a sausage longer than the bun!". Of course, all readers will be quick to point out that there never was a sausage exactly the length of a bun, they were either slightly shorter, or slightly longer. It was just a "more is more" marketing.

What's next


You are probably expecting a sausage to appear on the market "shorter than the bun!". And the circle will be complete. But, which one is the better design? Which one innovates? Same answer to both question: the original design for sausage, which dates back to at least the 9th century BC. Anything beyond that is in the presentation (the marketing).

Tech innovation


Now, back to technology. Let's take the phone, for example. Clearly, going wireless was an innovation. Going pocketable was an innovation. Touchscreen. Haptics. Innovations. But the same tech, just in a different (bigger and bigger, a.k.a. "more is more" marketing) package, is not innovation (*cough* apple *cough* samsung). In fact, one could say there is a clear regression in that field (phones used to have battery life expressed in weeks, could fit in your pocket, even in jogging shorts, could be dropped multiple times on rock hard surfaces without any problem etc)

You can do it


So, why am I talking about all of that? Well, it's my yearly encouragement to truly innovate (see last years post here). But you can't do it in a vacuum. Engage in your local community. If you haven't done so yet, make it a goal this year. Your local programing user groups (Python, Java, Javascript, whatever), maker space or hacker space, robotics, raspberry pi or other creative group, you local coworking, STEM/STEAM school groups etc. Not only will you benefit from attending, by growing your network and your knowledge, but you'll contribute something back to your community, to the society.

Before I sign off for the day, do read my post on innovation in general and personal scale innovation from last year.

@f_dion

Tuesday, June 17, 2014

Slowing down time

Is there a machine?


Quite frankly, that's the only way I'll be able to get back into my old posting habits, if I can slow down time...

So, just briefly, tomorrow is project night in Winston Salem: http://www.pyptug.org/2014/06/june-project-night.html

James is bringing a Parallela. Markus will probably have a Beaglebone black. And I'll have a Raspberry Pi. Perhaps some of that + duct tape and I can build a time lapse machine! (Nothing nefarious, in reality, just a security cam to keep an eye on the entrance, so visitors to the project night dont have to wait to long for somebody to come and open the door...)

Micro Python


While on the subject of embedded devices, what do you all think of micro python?


@f_dion

Saturday, January 25, 2014

How projects nights are enablers for innovation

Project nights


Do you attend project nights organized by your local maker group, hackerspace, python user group, raspberry pi user group or other similar tech meet?

No? Why not, is it because there are none? Suggest it, then. Or perhaps it is because you do not have anything to present, or do not need help with any projects. Having said that...

Innovation

Is not inventing something brand new from scratch. It's about standing on the shoulder of giants (a true, if somewhat overused metaphor). Taking many different things and bringing them together into a coherent entity, either a finished good, a software, a consumable or a building block for something else, in a new, innovative way.

It is not easy to achieve that. Are you familiar with all the bleeding and leading edge stuff happening in the tech space, in you area of expertise? Outside your area of expertise?

By attending project nights, and exchanging with people with different backgrounds and fields of expertise, the probability is much higher that you will come up with a solution, or even a new idea. But, more than that, it's at a personal level that you may benefit...

Personal scale innovation

While we all (well, a majority) would like to create the next big thing that will revolutionize the well being of mankind, truth is, what is more likely is to innovate at a personal level, household level or local community level. And your innovation or discussion may trigger another one, that is, if you are involved in some way in your community.

As an example, PYPTUG had a recent project night. One project was exploring the python picamera module. What started as that ended up creating two new projects, one based on Pi NoIR, the Raspberry Pi camera with no IR, as a way to detect heat loss (we'll see how well that works), and the other, as a helper to solder SMD devices.

Each month, there are many such moments of personal scale innovation. Perhaps not iPhone or Pebble (or Raspberry Pi) worldwide game changing innovation, but personal and local scale innovation.

François
@f_dion

Tuesday, November 19, 2013

Project Night: A red Raspberry Pi, 126 LEDs and a job

Project night


Every month, through PYPTUG, we set aside 2 nights for the Pythonistas and Pythonistas to be of the Piedmont Triad community. Tomorrow (wednesday the 20th of November) is one such night.

So what do we do there? The meetup page says:

"Do you have a project you want to show off? Or do you need a second set of eyes on your code? Would you like to hack on an open source project? Perhaps you need help getting a module on a specific platform? Don't have a project but would like to help others or to learn more Python?
Whatever the case may be, project nights are your opportunity to get some help or to help others, so bring your laptop (or Raspberry Pi or whatever device that can run Python) and let's get things going."

Red Raspberry Pi


So, I always show up at these project nights with a few potential projects. For example, hacking on Brython, or writing a good music collection manager in Python, or playing with a red Raspberry Pi. Red? Yes, this kind:

http://www.raspberrypi.org/archives/3195 

Pi Lite


But that wouldn't be a project in itself. I'll bring over a Pi Lite. What is that?

Ciseco Pi-Lite
126 ways to have fun.

Spectrum analyzer? network traffic display? game of life? cool scroller? Who knows what i'll end up doing, but it'll be fun, I'm sure.

A job?


Oh yes, almost forgot. So this project night is in Winston Salem:
Inmar 2650 Pilgrim Court, Winston Salem, nc

And it just happen to be that there are some openings for Python developpers, doing web services and focusing on Python. If that sounds like fun, get in touch.

Winston Salem is a great place to live and work (and that's me saying this, coming from cosmopolitan Montreal). Plus Inmar is migrating downtown pretty soon, in the Wake Forest Innovation Quarter. So come on, take the first step and possibly come and join me and other enthusiastic Pythonistas at Inmar and drop me a note, or even better, email me your resume.

Requirements:
Experience with Python (web services a plus) and with Postgresql (or even mysql).

François
@f_dion


Thursday, July 25, 2013

Of videogames, arduinos and 10 year olds

Vpython

That's Mr. Visual Python to you (the visual module, that is). At the last PYPTUG meeting, Aaron Titus gave a talk on Visual Python. I think it was about writing (well, mostly playing) videogames under the veneer of learning physics. :)

All joking aside, it was a really great talk. It was also the first time we were using Google+ Hangout to help some members to check the presentation. And particularly a father and daughter who would not have been able to make it in time for the meeting. More on that further down.

Pyfirmata lightning talk


So I gave a lightning talk on Pyfirmata and Arduinos. It was part of my talk at PyCarolinas last year but didn't have time to go into the code detail (plus another talk earlier that day had covered really extensively serial communications). And it's really about serial communications (be it USB, bluetooth or plain old RS-232/rs-422) and microcontrollers (it's not just for the 'duinos). I ran the python code on a Raspberry Pi, but you could use pretty much any computer that can run python.

The protocol is firmata: http://firmata.org

The python module is Pyfirmata: https://github.com/tino/pyFirmata

To install, you can use :
pip install pyfirmata
or
easy_install pyfirmata

Since both pip and easy_install automatically install dependencies, that's all there is on the host computer side.

Or from source using setup.py, but you will have to install the serial module.

You dont have to handle the serial stuff yourself, just point to the right /dev/ (serial, usb or bluetooth), start an interator and start using read(). Pyfirmata handles the serial itself and sending/receiving the sysex bytes (Firmata is a MIDI inspired protocol).


To install the firmata firmware on the Arduino, start the IDE and go to:

http://lizarum.com/assignments/programming/images/pd/arduino/standardFirmata.png

The bitbucket repository for my talk (presentation and simple example that reads values from analog port 0 on the arduino) is at:
https://bitbucket.org/fdion/pyptug


The young coder

"After watching the stream, this morning I left my 10 year old building spheres and boxes in VIdle.  She'd never done programming of any kind before last night." -- Ryan

I think this speaks volume about Python and the visual module. And that's what PYPTUG is all about. Now we just got to get her a Raspberry Pi.

François
@f_dion

Friday, February 1, 2013

Nouvelle publication DIY

faitmain

Un nouveau magazine vient de paraitre, il s'agit de Fait Main, un magazine collaboratif en ligne et en PDF:

http://www.faitmain.org

On y retrouve divers sujets autour du DIY("Do It Yourself"), et dans ce premier numéro, on y parle bien sur de Raspberry Pi.

J'ai écris l'article "câble d'interface pour Raspberry Pi" Lire l'article 

Mais ce n'est pas tout: 

Contenu du volume 1

La tribune de ce numéro est un parallèle entre web hébergé et OGM. Lire la tribune 

Le premier article présente une application de reconnaissance de feuille écrite pendant un Hackathon. C'est l'application qui a été écrite en 24 heures par Olivier, Ronan & Tarek lors du dernier AngelHack à Paris. On y parle de machine-learning au service des plantes, des hackathons de programmation & de responsive design . Lire l'article
Le deuxième article parle de domotique et vous explique comment piloter des dispositifs sans fils - portails, détecteurs de mouvements etc. On y parle d' Arduino , de Raspberry-PI et de signal en 433 mhz . Lire l'article 
 
Le troisième article présente le travail de Marcin Ignac: des méduses animées en 3D. Des captures d'écran de ces méduses ont ensuite été utilisées pour faire partie d'un projet de livre génératif. On y parle d' animation procédurale , de processing.js & d'hachurage. Lire l'article

Le quatrième article vous donne 5 conseils de photos culinaires pour que vous puissiez prendre en photos vos soupes, gigots et autres desserts comme un(e) pro. Lire l'article 

Suit une interview de Hugues Aubin au LabFab de Rennes. Lire l'article .
Un cinquième article sur la conception d'un Juke box avec un Raspberry-PI, sans aucune soudure requise :) Lire l'article 

Le sixième article vous explique comment recycler une vieille nappe de disque dur pour connecter le GPIO de votre Raspberry. Lire l'article 

Le septième article est une rapide présentation du jeu The Midst , conçu avec Processing et WebPD. Lire l'article 

Enfin, le huitième article aborde les bases du fonctionnement d'une CNC. Lire l'article 
Bonne Lecture!
— Tarek

Equipe

Le projet FaitMain est monté par Tarek Ziadé mais est surtout possible grâce aux créateurs d'articles et aux relecteurs.

Ont participé à ce numéro :

RaspberryPi talk @ForsythTechCC

Presentation

I'll be giving the talk "Raspberry Pi: From Kindergartners To Mad Scientists" at ForsythTech in Winston Salem, NC this coming Monday at 5:30pm (Feb 4th), and Thursday at 3pm (Feb 14th). It will be in the Hauser building, room 332.

Old school flyer

Just got a copy of the flyer:

It's that $25 computer talk

Each time I give this talk somewhere, it ends up quite different from the previous one. In part due to questions, and in part because I adjust the content to the target audience.

Should be fun, there is interest from several programs, so I'll cover a wide range of material.


@f_dion

Sunday, January 20, 2013

Going in the wrong direction

$35 going once


XYZ is the new RaspberryPi. Replace XYZ by several small form computers that have hit the market in the past year (particularly those powered by ARM). That is the claim being made again and again.

Except that the Pi is small, and a lot of the contenders are bigger. Or dont have gpios. And we re not talking about embedded systems. We need an OS. And Python. But really, at the end of the day, they cost too much. How much is too much I hear you say...

We are already conditioned to a $35 price tag. A fully capable Linux computer with a fast GPU and gpios. And a DSI and CSI connector. You can bring more to the table, such as ADC, PWM, USB3, bluetooth or sata, but if the price is greater, then you are going in the wrong direction.

$35 going twice


To put things in perspective as to what $35 buys you, at a local retailer, an Arduino Uno (an embedded system, so in theory it should be cheaper) will set me back $35, and then I have to add a $40 ethernet shield if I want to get it on the network. I go to Barnes and Nobles, and I cant find a decent computer science book for that amount. So yes, the Raspberry Pi foundation set the bar high.

Yet, it is impossible to ignore that. And the fact is that while $35 got you a 256MB Pi model B some months back, it now gets you a 512MB Pi model B.

Sold for $25


Just as we got comfortable with the Raspberry Pi model B, we are about to get a $25 version, with a lower power consumption. For a lot of projects, the model B was already overkill, so the model A will really further increase the perceived value of the Raspberry Pi platform.

What's the deal?


Why does it matter? Because at that price level, we don't mind losing one in an experiment. That means that, no matter how young or old, we all have an opportunity to try something we would never have done if the Pi cost $100 or even $80, and even less so if we had to use a $1000 computer...

Let me illustrate. As a teenager, I almost cut short my career in technology. I was working with a friend on building a robot, controlled by an Apple ][ compatible. Even though it was not the real deal (it was a clone), that computer was very expensive to us (over $1000). But we had no other way. And all our knowledge came from books at the library or bulletin board systems. There was no world wide web. But hey, we found out that the game port not only had digital and analog inputs (for analog joysticks), it also had digital outputs (annunciator 0- 3):

Apple 16-pin DIP Game Port socket (on the motherboard)
  for II, II+, IIe, IIgs


                           =========
Pushbutton 3 (GS only)  9 | *     * | 8  Ground
 Gm Ctrl 1 (Stick-1 Y) 10 | *     * | 7  Gm Ctrl 2 (Stick-2 X)
 Gm Ctrl 3 (Stick-2 Y) 11 | *     * | 6  Gm Ctrl 0 (Stick-1 X)
        Annunciator 3  12 | *     * | 5  /$C040 Strobe
        Annunciator 2  13 | *     * | 4  Pushbutton 2
        Annunciator 1  14 | *     * | 3  Pushbutton 1
        Annunciator 0  15 | *     * | 2  Pushbutton 0
        No Connection  16 | *     * | 1  +5V
                           ===| |===
                               ^
                        Notch on socket
                (faces toward front of computer)

Still, we were a little concerned in hacking the expensive machine. And sure enough, during our experimenting over many weeks, we melted one of the trace on the motherboard. Smoke. Bad smell. Angry mom. Sad friend with a busted Apple ][ compatible. Well, the story does have a happy ending in that we were able to repair the computer and we both continued experimenting and going each our way in the field of technology, but I'm not sure what would have happened had we not been able to fix the computer...

That is why we need $25 computers. It wouldn't surprise me if we see $20, or even sub $20 computers... If you were thinking $60, then as I mentionned, you are going in the wrong direction.

Food for thought


Now that we've cleared this point up, makers of Raspberry Pi add-ons, you're the next contestants on the price is right.  

Are you going in the wrong direction?


@f_dion

Friday, November 16, 2012

LuzBox

Bluetooth?


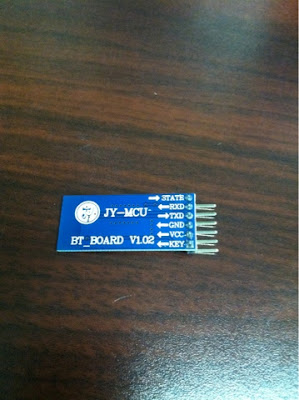
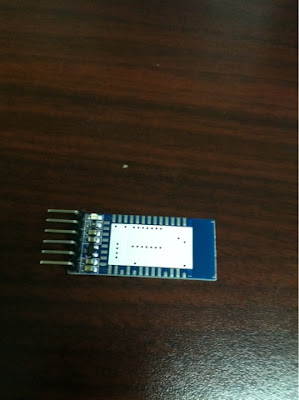
Desde el verano, fue a buscar una manera de conectar sin hilos a mi LuzBox lo mas barato posible. Finalmente, he recibido un módulo Bluetooth que opera con el Arduino Uno. O, al menos, eso es lo que pensé.


Todo bien de este lado...
Sólo he recibido una placa sin chips...

!Ay!

Por eso, estoy de vuelta a tratar de encontrar un módulo bluetooth muy barato que conecta a un Arduino. ¿Porque? Para hacer la programación y ajustar los horarios de mi LuzBox.

LuzBox


El nombre es muy obvio cuando uno ve la LuzBox en operación. Es un prototipo para experimentar con control de aparatos eléctricos. La LuzBox puede hacer igual que un ser humano, pero miles de veces a cada día, sin olvidar, sin descansar, y mucho mas rápido.

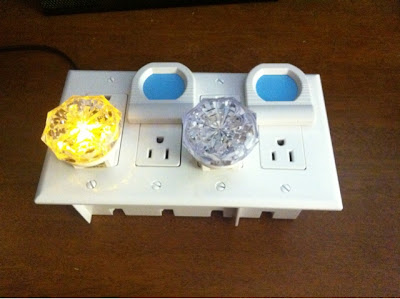
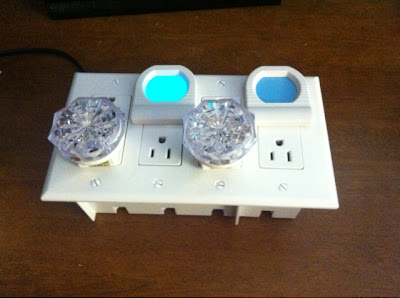
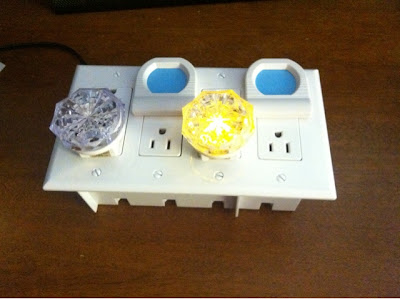
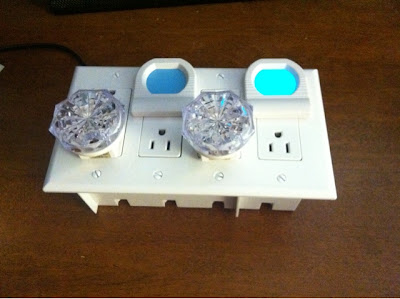
Por ejemplo, mi LuzBox esta siguiendo un programa en secuencia, demostrado aquí con lámparas de noche:


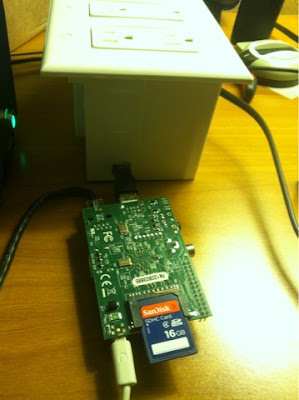
La LuzBox tiene cierta independencia por que el horario se ajusta con el tiempo y con sensores (temperatura, sonido y voy a añadir otros), pero, a cada vez que hay de cambiar el horario, la secuencia o el modo de operación, es necesario conectar el Raspberry Pi a la LuzBox (Arduino) por medio de USB:

Funciona, pero no tan conveniente...

Y es la razón por que estoy buscando un modulo Bluetooth que opera con el Arduino. Pero debe ser muy barato. Sino, un Raspberry Pi modelo A o B con dongle wifi es mucho mas barato que un Arduino + Bluetooth (o wifi).

Mientras tanto, pensé que les gustaría ver las entrañas de la LuzBox.

Componentes


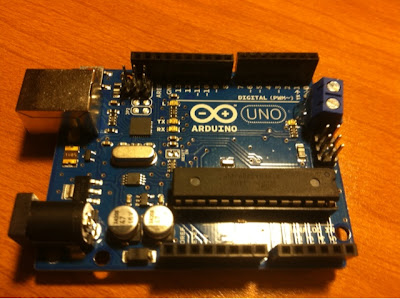
Empecé con un Arduino Uno (eventualmente voy a utilizar mi propio diseño para reducir el costo.

El Arduino Uno, opera independientemente del Pi
Una modificación: alimentación re-ubicada atrás

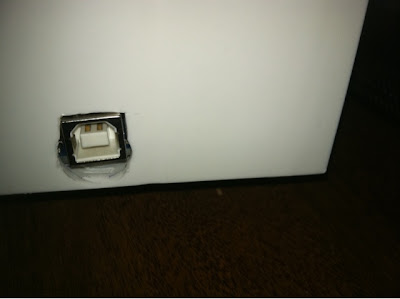
Fue necesario a re-ubicar la alimentación atrás, porque solo la conexión USB es accesible afuera de la LuzBox:

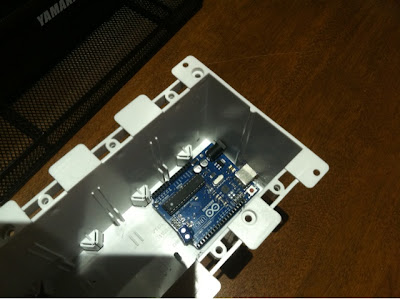
montaje empotrado
Mucho espacio en una caja eléctrica
con un "shield" de control de 4 canales
Al punto de poner todo en la caja


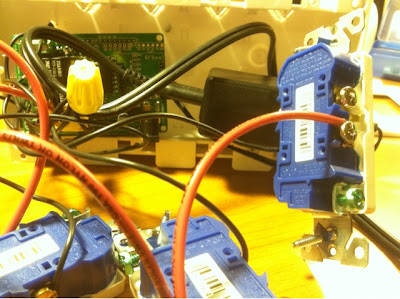
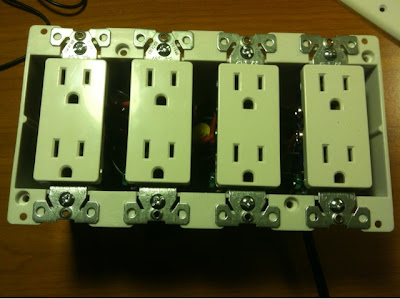
En la caja, hay el Arduino, el "shield", los sensores, una alimentación de 12V, receptáculos eléctricos 110V, un disyuntor y una cantidad de cable eléctrico.


Casi finalizado

Falta 6 tornillos

En cuanto a hacer la programmacion de un Arduino con un Raspberry Pi, es necessario hacer ciertas operaciones. Al minimo:


pi@raspberrypi ~ $ sudo usermod -a -G dialout fdion
pi@raspberrypi ~ $ sudo apt-get install arduino
Reading package lists... Done
Building dependency tree       
Reading state information... Done
The following extra packages will be installed:
  arduino-core avr-libc avrdude binutils-avr ca-certificates-java default-jre
  default-jre-headless extra-xdg-menus gcc-avr icedtea-6-jre-cacao
  icedtea-netx icedtea-netx-common java-common libatk-wrapper-java
  libatk-wrapper-java-jni libftdi1 libjna-java libnspr4 libnss3 libnss3-1d
  librxtx-java openjdk-6-jre openjdk-6-jre-headless openjdk-6-jre-lib
  ttf-dejavu-extra tzdata-java
Suggested packages:
  arduino-mk avrdude-doc task-c-devel gcc-doc gcc-4.2 equivs libjna-java-doc
  icedtea-plugin libnss-mdns sun-java6-fonts fonts-ipafont-gothic
  fonts-ipafont-mincho ttf-wqy-microhei ttf-wqy-zenhei ttf-indic-fonts
Recommended packages:
  icedtea-6-jre-jamvm
The following NEW packages will be installed:
  arduino arduino-core avr-libc avrdude binutils-avr ca-certificates-java
  default-jre default-jre-headless extra-xdg-menus gcc-avr icedtea-6-jre-cacao
  icedtea-netx icedtea-netx-common java-common libatk-wrapper-java
  libatk-wrapper-java-jni libftdi1 libjna-java libnspr4 libnss3 libnss3-1d
  librxtx-java openjdk-6-jre openjdk-6-jre-headless openjdk-6-jre-lib
  ttf-dejavu-extra tzdata-java
0 upgraded, 27 newly installed, 0 to remove and 0 not upgraded.
Need to get 58.3 MB of archives.
After this operation, 173 MB of additional disk space will be used.
Do you want to continue [Y/n]? Y 


Después de eso, es lo mismo que hacer la programación inicial de un Arduino con Windows o una machina Linux.

Tengo un poco mas en este articulo en frances: framboise a la mode arduino.

Sunday, October 28, 2012

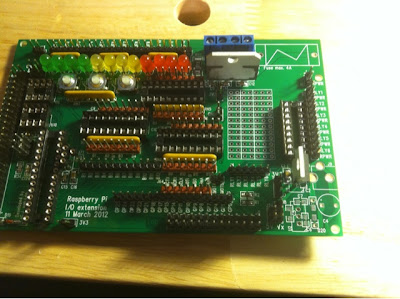
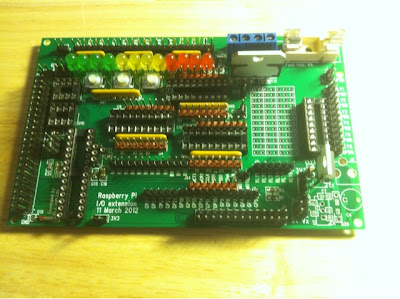
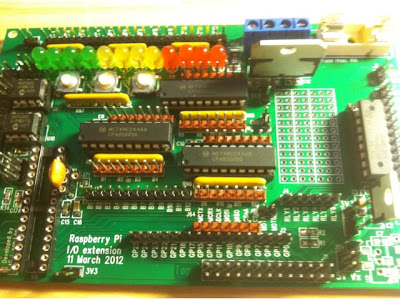
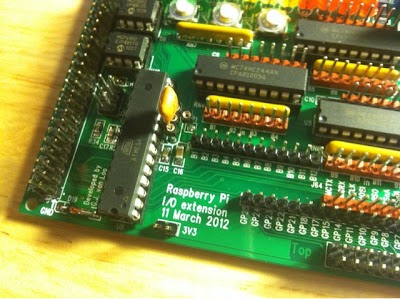
Assemblage Gertboard - La suite

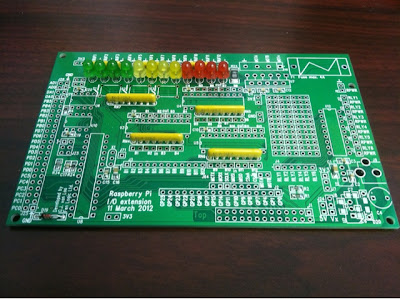
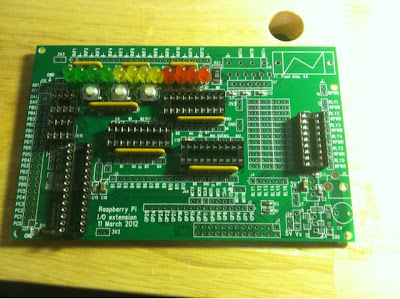
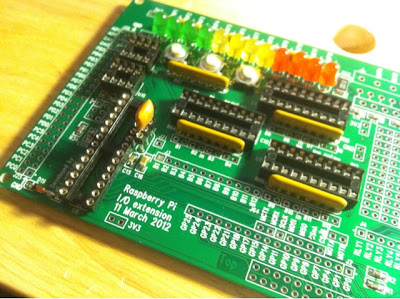
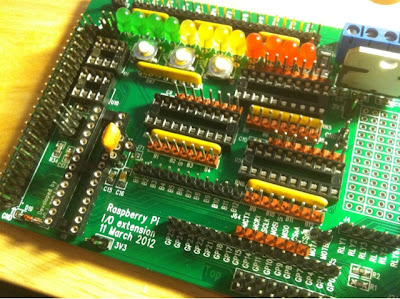
On continue. Dans l'article precedent on a fait la soudure des composants de surface. On s'assure ici d'avoir la bonne orientation sur ces réseaux SIL de résistances (en jaune). On doit pouvoir lire les marquages sur ces réseaux de ce point de vue:

Les premiers composants apres les CMS. Respecter l'orientation
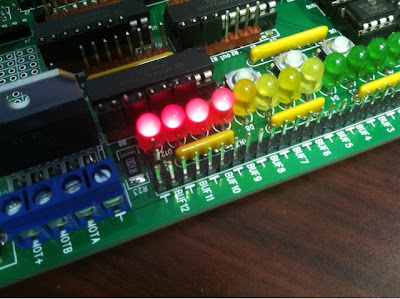
Les DEL en vert, jaune et rouge (le kit inclus rouge, seulement)
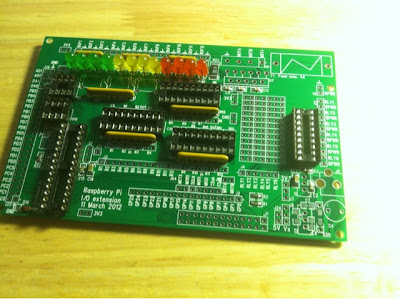
Les supports pour les circuits intégrés

Les 3 boutons sous les DEL

Pour le cristal qui controlera l'horloge du microcontroleur Atmega, il peut etre soudee directement a la carte. Dans mon cas j'ai mis un support pour pouvoir remplacer le cristal pour un a plus haute frequence, dans le futur.

Le cristal (support a 3 pattes)

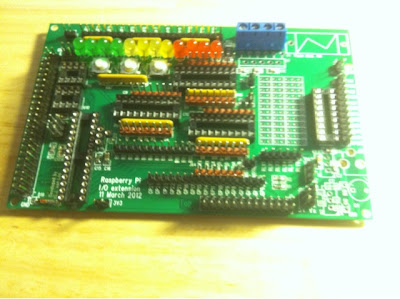
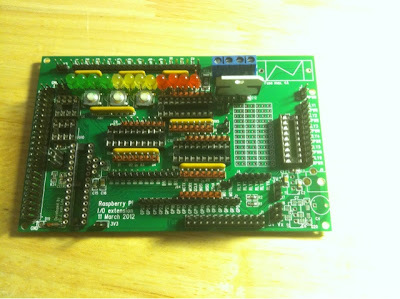
Pour les barrettes, j'ai remplacé celles qui sont utilisées pour les cavaliers (jumpers) par des barrettes couleur brique. C'est plus facile a visualiser ou vont les cavaliers (pour établir les modes d’entrée et sortie des 12 E/S etc). J'ai aussi remplacé le connecteur a vis, en bleu sur la photo. Il était noir dans le kit de Farnell. Encore une fois, question d’améliorer la visualisation. Finalement, j'ai mis des barrettes optionnelles pour les points 5V5, 3V3 et GND (masse).
Les barrettes de connections simple et double rangées

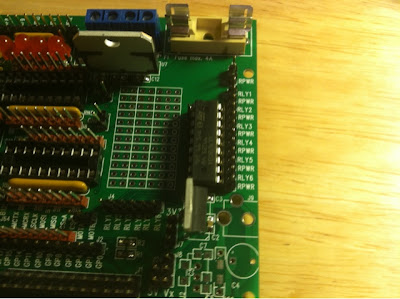
Le pilote pour les moteurs (sous le connecteur a vis bleu)
Le régulateur TC1262. Notez l'orientation!
Le support pour le fusible
Nous somme prêt a mettre les circuits intégrés
Les convertisseurs analogiques et numériques

Le réseau de transistors pour les relais
Les tampons 74hc244 pour les entrées et sorties
Le Atmega328P (comme les Arduino Uno)

Pour la programmation du Atmega,il faudra utiliser l'environnement Arduino. J'explique comment se le procurer ici: Framboise a la mode Arduino
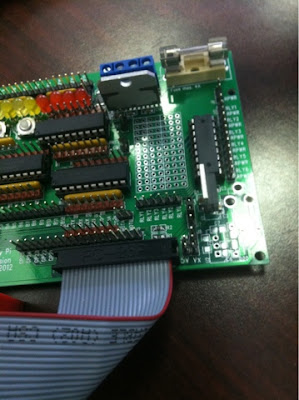
Le câble d’interconnexion

Le module et un Rasperry Pi pret a l'utilisation

Et voila. Il faut maintenant se procurer les programmes de test:

$ wget "http://www.raspberrypi.org/phpBB3/download/file.php?id=1434" -O gertboard.tar.gz
$ tar vfxz gertboard.tar.gz
$ cd gertboard*
$ make

On execute ensuite les programmes de tests selon le guide de l'utilisateur (en anglais). Je vais mettre des tutoriels sur mon blog au cours des prochaines semaines.
On fait un petit test, ca fonctionne!


Wednesday, October 17, 2012

Arduino power connection hack

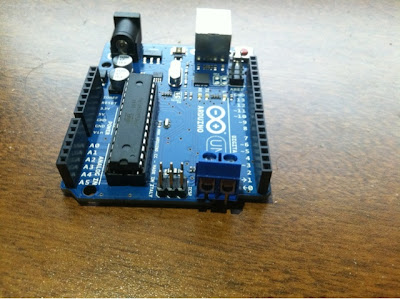
About half of my arduinos end up in projects where I flush mount them:


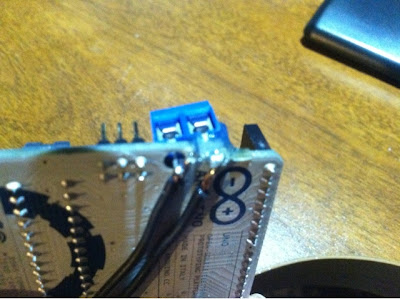
I'm sure you figured out the issue with that. The power jack is right next to the USB. And the back of the Arduino has no power input.


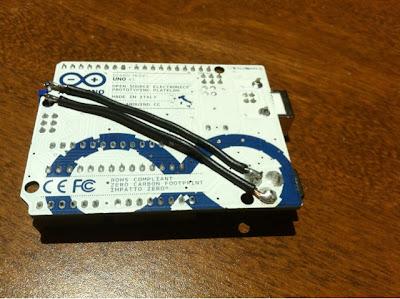
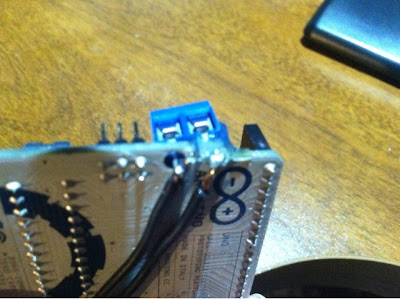
But I only want to expose the USB to the outside, to reprogram the arduino, and that is it. The product should be self powered, or have a single cord to connect to the wall socket. An easy hack is to add a connector for +Vin and GND at the back:


Simply solder wires as such:


And a little hot glue to finish the job (on top and under):


I can now connect power from the back. It also clears a shield.

Thursday, October 11, 2012

Framboise a la mode arduino

C'est un jeu d'enfant


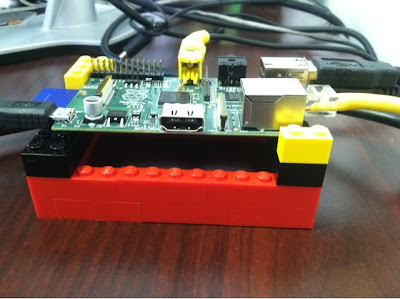
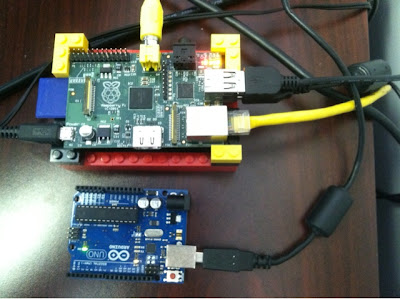
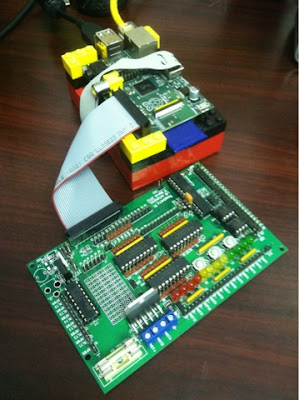
Vous aimez le petit support en lego? J'ai trouvé quelques pièces, pas assez pour faire un boitier, mais assez pour faire un support.


Mais, bon, mon Raspberry Pi s'ennuyait tout seul, il lui fallait donc un copain.

Le copain l'Arduino


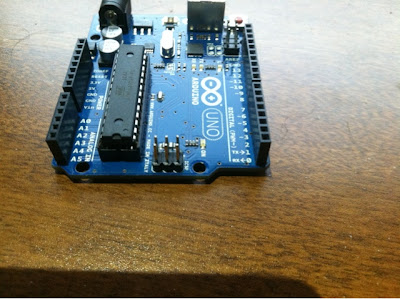
C'est un Arduino uno. J'en utilise une bonne quantité de ces petits boards a la sauce atmega328. D'ailleurs ce matin, 10 de Octobre, je m'en suis procuré d'autres, a seulement $20 l’unité chez un revendeur sur Amazon - ça c'est vendu en quelques minutes a ce prix. Ca se trouve aussi moins cher, a $15, mais il faut alors attendre des semaines car cela vient de Chine.

C'est une plateforme libre utilisant des microcontrôleurs Atmel, Arduino se référant a la plateforme avec son interface pour carte filles, et Uno a un des modèles.

Je travaille en ce moment sur un projet international avec des Arduino (mon 7ieme projet commercial de ce type) et je vais probablement en commencer un autre vers la fin du mois qui lui ne va pas rester sur Arduino. Le prototype sera sur Arduino, mais le produit final,  ce sera sur le même microcontroleur Atmel Atmega328 avec une carte mère spécialisée.

Quand j'ai commencé avec les microcontrôleurs dans les années 90, il fallait tout faire soit même, et ecrire tout en code machine. Altera, Xilinx, PIC... Maintenant, avec les Arduino Uno et les Parallax Propeller c'est assez simple, c'est comme jouer avec des Lego :)


Ca se branche par le port USB (ou serie). Mon alimentation du Raspberry Pi (une alimentation de mobile Blackberry de 700mA) est suffisante pour alimenter le Arduino uno directement par le port USB:


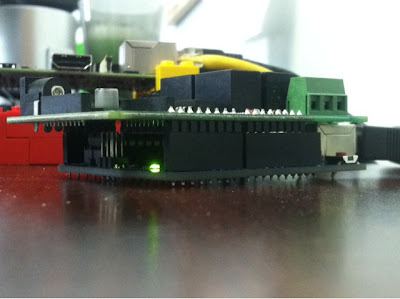
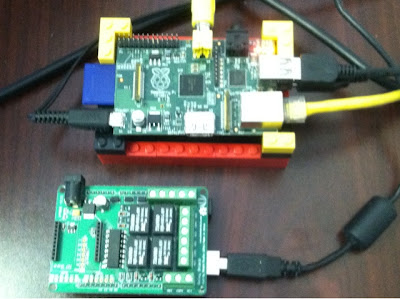
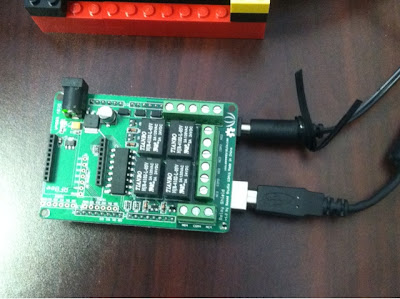
Par contre si on branche un "shield" (c'est ainsi que l'on appelle les cartes filles en langage Arduino), il n'y a pas assez de jus pour alimenter le shield, sa LED reste éteinte (mais le Arduino lui est ok):


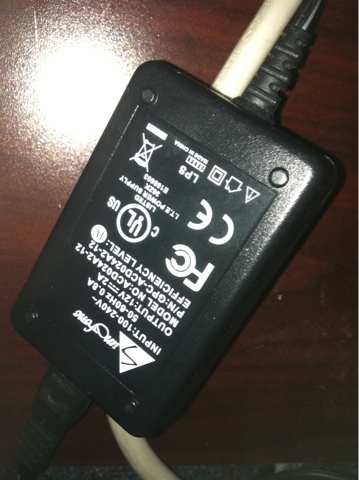
Il faudra donc utiliser une alimentation externe pour cela. Le arduino peut etre alimenter en 5V par USB ou en externe en 7V-12V. Donc ceci fera bien l'affaire, 12VDC 2A:


Je le branche directement a l'Arduino. J'aurais pu le connecter au shield lui-même, mais il y a un avantage a faire cela. Vous allez voir plus bas.


On verifie que le Uno est bien vu par le Raspberry Pi:


pi@raspberrypi ~ $ lsusb
Bus 001 Device 001: ID 1d6b:0002 Linux Foundation 2.0 root hub
Bus 001 Device 002: ID 0424:9512 Standard Microsystems Corp. 
Bus 001 Device 003: ID 0424:ec00 Standard Microsystems Corp. 
Bus 001 Device 009: ID 2341:0043 Arduino SA Uno R3 (CDC ACM)
pi@raspberrypi ~ $ 


L'installation

Avant de faire l'installation du logiciel, du compilateur, de l'environnement de développement pour l'Arduino, on s'assure que Raspbian est bien a jour en faisant un ap-get update (deux fois au cas ou):


Linux raspberrypi 3.2.27+ #160 PREEMPT Mon Sep 17 23:18:42 BST 2012 armv6l

The programs included with the Debian GNU/Linux system are free software;
the exact distribution terms for each program are described in the
individual files in /usr/share/doc/*/copyright.

Debian GNU/Linux comes with ABSOLUTELY NO WARRANTY, to the extent
permitted by applicable law.

pi@raspberrypi ~ $ sudo apt-get update
Get:1 http://mirrordirector.raspbian.org wheezy InRelease [12.5 kB]
Get:2 http://archive.raspberrypi.org wheezy InRelease [7,665 B]
Get:3 http://mirrordirector.raspbian.org wheezy/main armhf Packages [7,376 kB]
Get:4 http://archive.raspberrypi.org wheezy/main armhf Packages [5,738 B]
Ign http://archive.raspberrypi.org wheezy/main Translation-en_GB              
Ign http://archive.raspberrypi.org wheezy/main Translation-en
Get:5 http://mirrordirector.raspbian.org wheezy/contrib armhf Packages [23.3 kB]
Get:6 http://mirrordirector.raspbian.org wheezy/non-free armhf Packages [46.4 kB]
Get:7 http://mirrordirector.raspbian.org wheezy/rpi armhf Packages [14 B]      
Ign http://mirrordirector.raspbian.org wheezy/contrib Translation-en_GB        
Ign http://mirrordirector.raspbian.org wheezy/contrib Translation-en           
Ign http://mirrordirector.raspbian.org wheezy/main Translation-en_GB           
Ign http://mirrordirector.raspbian.org wheezy/main Translation-en              
Ign http://mirrordirector.raspbian.org wheezy/non-free Translation-en_GB       
Ign http://mirrordirector.raspbian.org wheezy/non-free Translation-en          
Ign http://mirrordirector.raspbian.org wheezy/rpi Translation-en_GB            
Ign http://mirrordirector.raspbian.org wheezy/rpi Translation-en               
Fetched 7,471 kB in 40s (183 kB/s)                                             
Reading package lists... Done
pi@raspberrypi ~ $ sudo apt-get update
Hit http://archive.raspberrypi.org wheezy InRelease
Hit http://mirrordirector.raspbian.org wheezy InRelease
Hit http://archive.raspberrypi.org wheezy/main armhf Packages
Hit http://mirrordirector.raspbian.org wheezy/main armhf Packages
Hit http://mirrordirector.raspbian.org wheezy/contrib armhf Packages
Hit http://mirrordirector.raspbian.org wheezy/non-free armhf Packages
Hit http://mirrordirector.raspbian.org wheezy/rpi armhf Packages
Ign http://archive.raspberrypi.org wheezy/main Translation-en_GB
Ign http://archive.raspberrypi.org wheezy/main Translation-en
Ign http://mirrordirector.raspbian.org wheezy/contrib Translation-en_GB
Ign http://mirrordirector.raspbian.org wheezy/contrib Translation-en
Ign http://mirrordirector.raspbian.org wheezy/main Translation-en_GB
Ign http://mirrordirector.raspbian.org wheezy/main Translation-en
Ign http://mirrordirector.raspbian.org wheezy/non-free Translation-en_GB
Ign http://mirrordirector.raspbian.org wheezy/non-free Translation-en
Ign http://mirrordirector.raspbian.org wheezy/rpi Translation-en_GB
Ign http://mirrordirector.raspbian.org wheezy/rpi Translation-en
Reading package lists... Done
pi@raspberrypi ~ $ 


Je suis a jour, et pas besoin de faire de apt-get upgrade.

Maintenant on fait l'installation. C'est d'une simplicite choquante, apt-get install arduino!


pi@raspberrypi ~ $ sudo apt-get install arduino
Reading package lists... Done
Building dependency tree       
Reading state information... Done
The following extra packages will be installed:
  arduino-core avr-libc avrdude binutils-avr ca-certificates-java default-jre
  default-jre-headless extra-xdg-menus gcc-avr icedtea-6-jre-cacao
  icedtea-netx icedtea-netx-common java-common libatk-wrapper-java
  libatk-wrapper-java-jni libftdi1 libjna-java libnspr4 libnss3 libnss3-1d
  librxtx-java openjdk-6-jre openjdk-6-jre-headless openjdk-6-jre-lib
  ttf-dejavu-extra tzdata-java
Suggested packages:
  arduino-mk avrdude-doc task-c-devel gcc-doc gcc-4.2 equivs libjna-java-doc
  icedtea-plugin libnss-mdns sun-java6-fonts fonts-ipafont-gothic
  fonts-ipafont-mincho ttf-wqy-microhei ttf-wqy-zenhei ttf-indic-fonts
Recommended packages:
  icedtea-6-jre-jamvm
The following NEW packages will be installed:
  arduino arduino-core avr-libc avrdude binutils-avr ca-certificates-java
  default-jre default-jre-headless extra-xdg-menus gcc-avr icedtea-6-jre-cacao
  icedtea-netx icedtea-netx-common java-common libatk-wrapper-java
  libatk-wrapper-java-jni libftdi1 libjna-java libnspr4 libnss3 libnss3-1d
  librxtx-java openjdk-6-jre openjdk-6-jre-headless openjdk-6-jre-lib
  ttf-dejavu-extra tzdata-java
0 upgraded, 27 newly installed, 0 to remove and 0 not upgraded.
Need to get 58.3 MB of archives.
After this operation, 173 MB of additional disk space will be used.
Do you want to continue [Y/n]? 
[et on y va... longue liste]


On nous suggere d'autres archives, on les installe au cas ou:


pi@raspberrypi ~ $ sudo apt-get install arduino-mk avrdude-doc equivs libjna-java-doc icedtea-plugin libnss-mdns fonts-ipafont-gothic fonts-ipafont-mincho ttf-wqy-microhei ttf-wqy-zenhei ttf-indic-fonts
Reading package lists... Done
Building dependency tree       
Reading state information... Done
The following extra packages will be installed:
  autopoint avahi-daemon bind9-host debhelper fonts-beng fonts-beng-extra
  fonts-deva fonts-deva-extra fonts-gubbi fonts-gujr fonts-gujr-extra
  fonts-guru fonts-guru-extra fonts-indic fonts-knda fonts-knda-extra
  fonts-lohit-beng-assamese fonts-lohit-beng-bengali fonts-lohit-deva
  fonts-lohit-gujr fonts-lohit-guru fonts-lohit-knda fonts-lohit-mlym
  fonts-lohit-orya fonts-lohit-taml fonts-lohit-telu fonts-mlym fonts-nakula
  fonts-navilu fonts-orya fonts-orya-extra fonts-pagul fonts-sahadeva
  fonts-samyak-gujr fonts-samyak-taml fonts-smc fonts-taml fonts-telu
  fonts-telu-extra geoip-database gettext git git-man html2text
  icedtea-6-plugin intltool-debian libavahi-core7 libbind9-80
  libconfig-yaml-perl libcurl3-gnutls libdns81 liberror-perl libgeoip1
  libgettextpo0 libisc83 libisccc80 libisccfg82 liblwres80
  libmail-sendmail-perl libsys-hostname-long-perl libunistring0
  libyaml-libyaml-perl libyaml-perl perl-doc po-debconf rsync
Suggested packages:
  avahi-autoipd doc-base dh-make gettext-doc git-daemon-run
  git-daemon-sysvinit git-doc git-el git-arch git-cvs git-svn git-email
  git-gui gitk gitweb geoip-bin libyaml-shell-perl groff libmail-box-perl
The following NEW packages will be installed:
  arduino-mk autopoint avahi-daemon avrdude-doc bind9-host debhelper equivs
  fonts-beng fonts-beng-extra fonts-deva fonts-deva-extra fonts-gubbi
  fonts-gujr fonts-gujr-extra fonts-guru fonts-guru-extra fonts-indic
  fonts-ipafont-gothic fonts-ipafont-mincho fonts-knda fonts-knda-extra
  fonts-lohit-beng-assamese fonts-lohit-beng-bengali fonts-lohit-deva
  fonts-lohit-gujr fonts-lohit-guru fonts-lohit-knda fonts-lohit-mlym
  fonts-lohit-orya fonts-lohit-taml fonts-lohit-telu fonts-mlym fonts-nakula
  fonts-navilu fonts-orya fonts-orya-extra fonts-pagul fonts-sahadeva
  fonts-samyak-gujr fonts-samyak-taml fonts-smc fonts-taml fonts-telu
  fonts-telu-extra geoip-database gettext git git-man html2text
  icedtea-6-plugin icedtea-plugin intltool-debian libavahi-core7 libbind9-80
  libconfig-yaml-perl libcurl3-gnutls libdns81 liberror-perl libgeoip1
  libgettextpo0 libisc83 libisccc80 libisccfg82 libjna-java-doc liblwres80
  libmail-sendmail-perl libnss-mdns libsys-hostname-long-perl libunistring0
  libyaml-libyaml-perl libyaml-perl perl-doc po-debconf rsync ttf-indic-fonts
  ttf-wqy-microhei ttf-wqy-zenhei
0 upgraded, 77 newly installed, 0 to remove and 43 not upgraded.
Need to get 49.1 MB of archives.
After this operation, 116 MB of additional disk space will be used.
Do you want to continue [Y/n]? 
[et on y va... une autre longue liste]


On y va


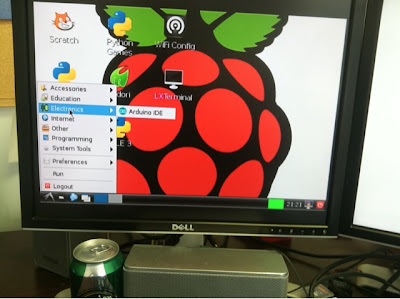
Une fois installé on peut voir sous electronics, le Arduino IDE dans le menu LXDE:


On peut aussi lancer par la ligne de commande l'environnement en tapant:

arduino

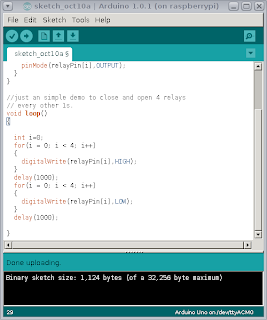
D'ailleurs, si on accède a notre Raspberry Pi par l'entremise d'un PC et de ssh -X, l'IDE s'affiche alors sur notre PC, mais roule sur le Raspberry Pi. Une fois que l'on a écrit du code Wiring (du C avec des fonctions spéciales genre analogWrite, digitalWrite etc), on clique sur le bouton avec la coche pour compiler.

Pour transférer le programme executable sur l'Arduino, on clique sur la flèche qui pointe vers la droite. Les relais vont commencer a travailler du moment que le programme est transféré.


Finalement, l'avantage d'avoir l'alimentation sur le Arduino, c'est que l'on peut retirer le Raspberry Pi et notre programme continue de rouler sur l'Arduino, activant les relais sans problemes.


Finalement, il ne s'agit que d'un exemple bien simple. On peut aussi controler l'Arduino avec Firmata (un protocole de communication) et le module Python PyFirmata.

Aussi, de façon générale, je contrôle les relais directement du Raspberry Pi, mais ça, c'est pour une autre fois.