AI agents are revolutionizing the digital workforce by transforming business operations, automating complex tasks, and unlocking new efficiencies. With the ability to collaborate, these agents can now work together to tackle complex problems and drive even greater impact.
The NVIDIA NeMo Agent toolkit is an open source library that simplifies the integration of agents, regardless of the framework they are built on. This toolkit allows developers to create a unified environment where different data sources and tools can be easily combined and reused. The UI and integrated development environment (IDE) integration provides a user-friendly interface for developers, making it easier to manage and deploy agents.

In this video, we walk you through how to use the open source library to build custom AI agents that can reason about complex problems and draw information from multiple sources.
You’ll learn the steps for building custom AI agents with the toolkit including:
- Setting up your project with the scaffolding utility: To get started with NVIDIA NeMo Agent toolkit, you can use the workflow create command to generate a project scaffold. This command provides a pyproject.toml file that specifies all the pieces that’ll be plugins, along with a config.yaml file that defines the components of your agent. The toolkit provides flexible ways to host the agent, including as an MCP server and FastAPI microservice. This video demonstrates use of the FastAPI option, allowing you to make POST requests to invoke the agent. This microservice can be configured to use a specific LLM and embedding model, which are crucial for the RAG tools.
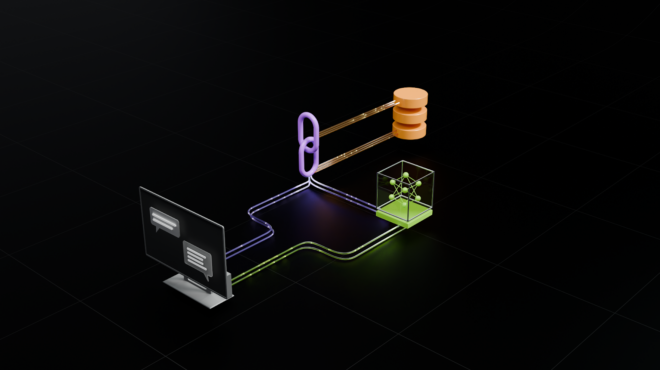
- Creating a multi-RAG agent: See the process of creating a multi-RAG agent, which is an agent that can access multiple RAGs to reason about problems and draw necessary information. The RAGs are tools that can be hosted locally or remotely, and they are defined in the function section of the config.yaml file. For example, the video shows the creation of RAGs for dress code, payroll, and PTO policies. These RAGs are implemented using the same underlying plugin but with different parameters, showcasing the toolkit’s flexibility.
- Instantiating and configuring a ReAct agent: To implement a custom agent, the video walks through the necessary imports and configurations. The agent is provided with a list of tools, an LLM client, and a prompt. The LLM client communicates with a remote LLM, and the prompt is used to guide the agent’s responses. The agent executor is then set up to manage the agent’s interactions, including handling chat history and recent messages. This setup ensures that the agent can effectively use the RAG tools to provide accurate and context-aware responses.
- Setting up a FastAPI microservice: The final step in the process is to set up a FastAPI microservice. This microservice acts as the main entry point for invoking the agent. The configuration file is updated to match the new function defined as the entry point, and the toolkit info components command-line utility is used to ensure that the necessary parameters are correctly specified. The microservice is then brought up, and the agent is ready to respond to user queries by calling the RAG tools.
Get started with the NVIDIA NeMo Agent toolkit by watching this new how-to video or downloading it on GitHub.