
Server Side Rendering (SSR) is a very useful technique that makes web apps appear faster. The initial HTML is displayed before the JavaScript is parsed and, while the user is deciding what to tap on, our handlers are ready.
Server side rendering in React requires additional work to setup and has server costs. Furthermore, if your server team cannot have JavaScript running on your servers, you are stuck. It significantly complicates the CDN setup especially if you have pages that require login and where the user’s information is managed.
I want to walk through a new concept called Render Caching. This is a cool trick that can give users an instant performance boost just like that of SSR without having to resort to writing code on the server.
What is Render Caching?
The migration from static HTML pages to Single Page Apps (SPAs) has left a gaping hole in the entire concept of caching that the web has traditionally relied on. While browsers optimize delivery and rendering of the initial HTML, an SPA leaves them blank to be filled in later.
Render Caching optimizes the SPA render and can significantly improve the perceptible load time of web pages. It does that by caching the rendered HTML in the browser for next load and can provide that display without the JavaScript parsing that eats up our display time.
Enabling Render Caching
We mentioned earlier that setting up SSR for React requires additional setup and server costs. Render Caching avoids those burdens.
It takes a few steps to set it up. Let’s break it down into digestible pieces.
Step 1: Determine the correct caching state
Figure out the conditions for the current page where it would render the same when a user opens it on the next visit.
For example, you could create a JSON object with the current build number or a user ID. The key is to ensures that the state is encapsulated in the URL, local storage or cookies and do not need a server call for.
Step 2: Setup API calls
Ensure all API calls happen before the render call to react. This makes sense in regular use cases as well where we want to prevent the page from changing under the user which causes flickers.
Step 3: Cache locally in the unload handler
Now add a unload event handler to the document. Store the current DOM in localStorage/indexDB.
That looks something like this, using a build number and a user ID to determine the caching state covered in Step 1:
window.addEventListener("beforeunload", () => {
  // Production code would also be considerate of localStorage size limitations
  // and would do a LRU cache eviction to maintain sanity on storage.
  // There should also be a way to clear this data when the user signs out
  window.localStorage.setItem(
    `lastKnown_${window.location.href}`,
    JSON.stringify({
      conditions: {
        userId: "<User ID>",
        buildNo: "<Build No.>"
      },
      data: document.getElementById("content").innerHTML
    })
  );
});

// If you want to store data per user, you can add user ID to the key instead of the condition.
Step 4: Restore the last known state on load
Next up, we want to pull the last known state from the browser’s local storage so we can use it on future visits. We do this by adding the following to the HTML file (e.g. `index.html` below the document’s the body tag.
<!-- ... -->
</body>

<script>
  let lastKnownState = window.localStorage.getItem(`lastKnown_${window.location.href}`);

  lastKnownState = lastKnownState && JSON.parse(lastKnownState);

  if (lastKnownState &&
    lastKnownState.conditions.userId === "<User ID>" &&
    lastKnownState.conditions.buildNo === "<Build No.>") {
    document.getElementById('content').innerHTML = lastKnownState.data;
    window.hasRestoredState = true;
  }
</script>
Step 5: Render the last known state in React
This is where the rubber meets the road. Now that we have the user’s last known state visible in the DOM, we can fetch the full content and render our app in that state by updating the top level of React’s render with hydrate conditionally. Event handlers will become functional once this code hits but the DOM should not change.
import {render, hydrate} from "react-dom"

if (window.hasRestoredState) {
  hydrate(<MyPage />, document.getElementById('content'));
} else {
  render(<MyPage />, document.getElementById('content'));
}
Step 6: Go Async all the way
Turn your script tags from sync to async/defer for loading the JavaScript files. This is another key step to ensure a smooth loading and rendering experience on the front end.
That’s it! Reload the page to see the boost in performance.
Measuring improvement
OK, so you did all that work and now you want to know just how performant your site is. You’re going to want to benchmark the improvements.
Render Caching shines in situations where you have multiple server calls before you know what to render. On script-heavy pages, JavaScript can actually take a lot of time to parse.
You can measure the load performance in the Performance tab in Chrome’s DevTools.
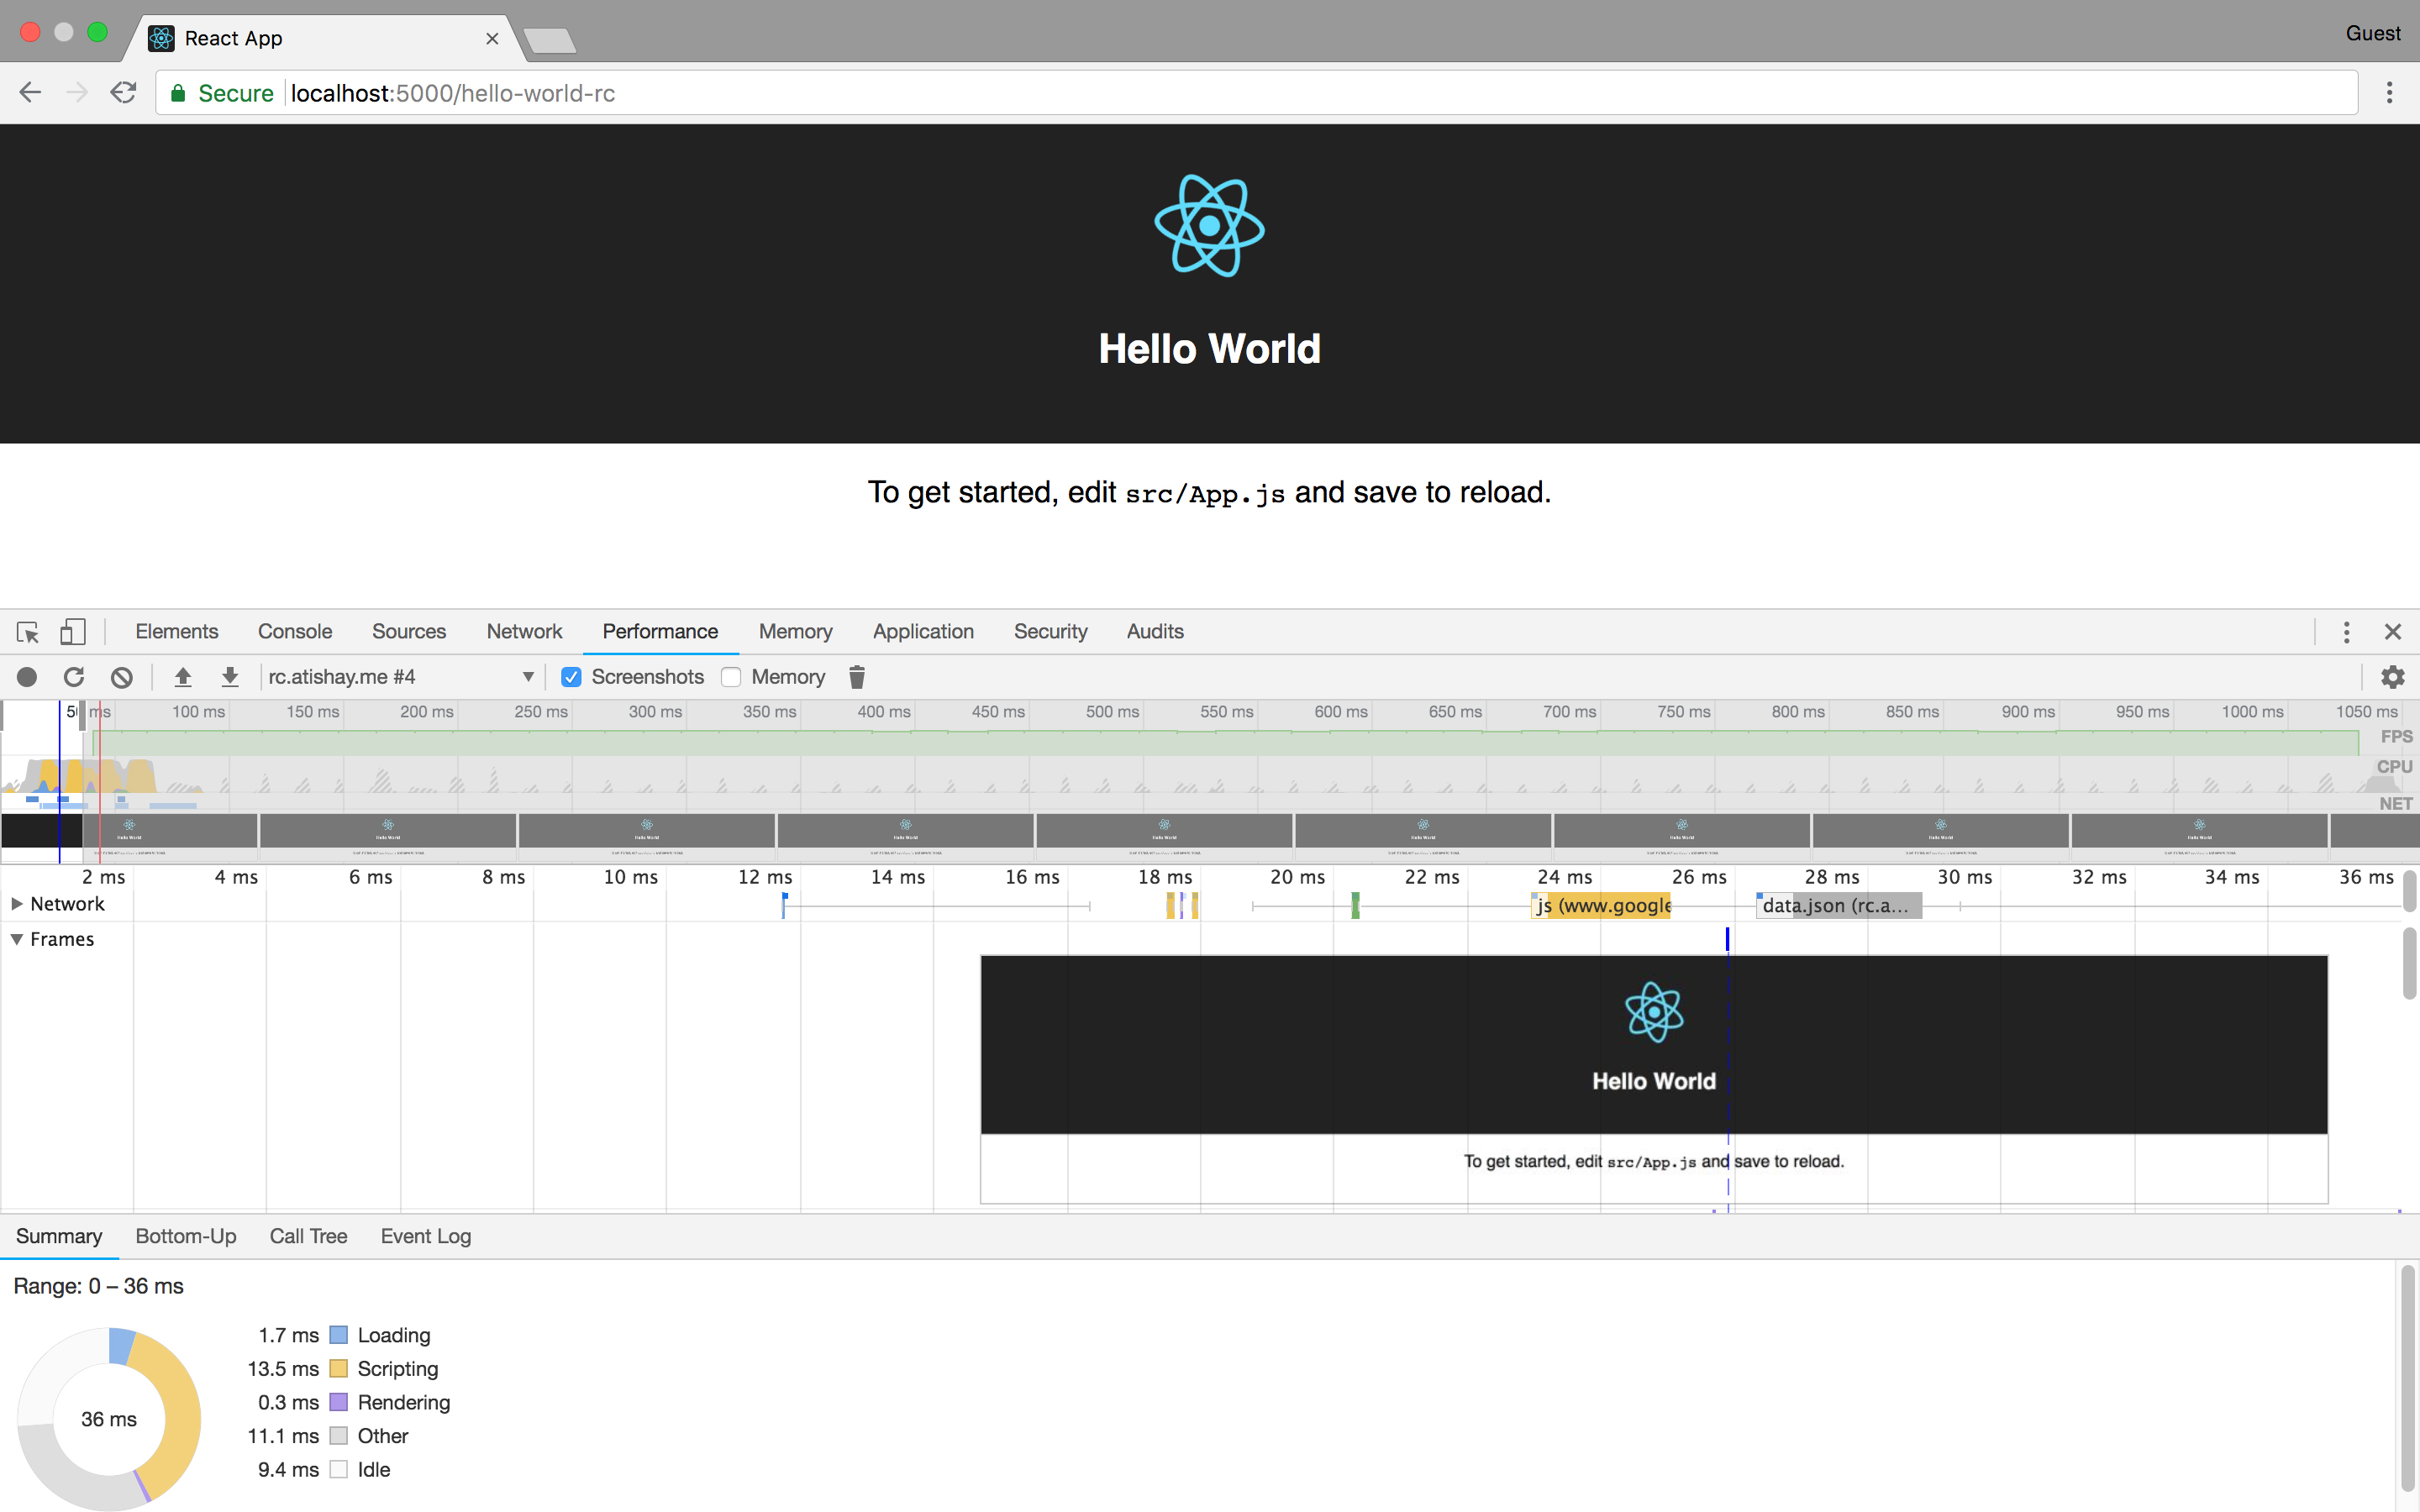
Ideally, you’d use a guest profile so that your browser extensions won’t interfere with the measurements. You should see a significant improvement on reload. In the screenshot above, we a sample app with an async data.json fetch call that is performed before calling ReactDOM.hydrate. With Render Caching, the render is complete even before the data is loaded!
Wrapping up
Render Caching is a clever technique to ensure that the perceived speed of re-fetches of the same web page is faster by adding a caching layer to the final HTML and showing them back to the user. Users who visit your site frequently are the ones who stand to benefit the most.
As you can see, we accomplished this with very little code and the performance gains we get in return are huge. Do try this out on your website and post your comments. I’d love to hear whether your site performance sees the same significant boosts that I’ve experienced.
“Ensure all API calls happen before the render call to react.”
This is quite a tricky task because it means not doing the usual React practice of making API calls per component in componentDidMount. Do you have an example of how you would do it?
Hi Anon,
If you wait till componentDidMount for doing server calls, the server calls cannot happen until the component has gone through one render pass which will cause at least one flicker even if no render caching is involved. With render caching, the first render pass will delete the rendered data on DOM. If the same data is needed by two components, it will need two API calls.
I keep my render and data pieces separate and use a state management library to pass on the information between the two. Therefore the server access can be made independent of the rendering and closer to routing. The same approach is used for server side rendering and for the same reasons.
Doing server calls in componentDidMount is the recommended way because componentWillMount can be called more than once before it is mounted, and if you do it constructor or componentWillMount the call can return before the component is rendered, and it is illegal to call setState before the component is rendered.
I am not arguing for componentWillMount. The suggestion is to move the server access out of react and store the data in a state management library like MobX or Redux rather than using react’s state if you need render caching. Then you can set up the data before mounting react.
In Demystifying server-side rendering in React, Alex Moldovan presents a pattern leveraging a static declaration called serverFetch in combination with Redux Thunks. I took that idea as well as many others and incorporated into Paragons which offers SSR out of the box.
David Munger reports that the following error is coming up in React 17: “Warning: Did not expect server HTML to contain a
<div>in<div>.”